Saturday, March 23, 2013

Equipment Tips: Kitchen Efficiency in the Home

Professional kitchen equipment is often very different from what you use at home. There are similarities (everyone needs spoons), but there are also key differences. Industrial equipment is designed and purchased with several important factors in mind. This post is all about analyzing the equipment in your kitchen and using the result to save money and streamline your work space.


Chefs take certain considerations into account when purchasing equipment, and not all of them are as important to home cooks. But it never hurts to understand what those considerations are and how they can be used to maximize efficiency in your kitchen at home.

Let's take a look at some factors that determine the overall value of a piece of equipment:

Equipment Efficiency

How much time and energy does it save?
If the answer is "a little bit" or "maybe 5 minutes," then you don't need it and it's just taking up space. Developing the skills needed to use simple tools more effectively will save you much more time and energy in the long run, and the resulting food product will almost always be superior. Before purchasing a tool or piece of equipment, think about whether or not you really need it. The most valuable tools are not always the ones that replace work that can be done by hand. It really all comes down to expectations; if all you care about is minimizing time and effort, there are millions of poorly manufactured kitchen gadgets that will provide you with consistently average results. Superior quality and overall efficiency comes from learning to do it efficiently by hand, with basic tools. This saves you from having to find a place to store a bunch of bulky appliances that really only have one use, e.g.(salad shooter).                      
                                                       

Compatibility

How well does it fit with your other equipment and how much extra space does it occupy?
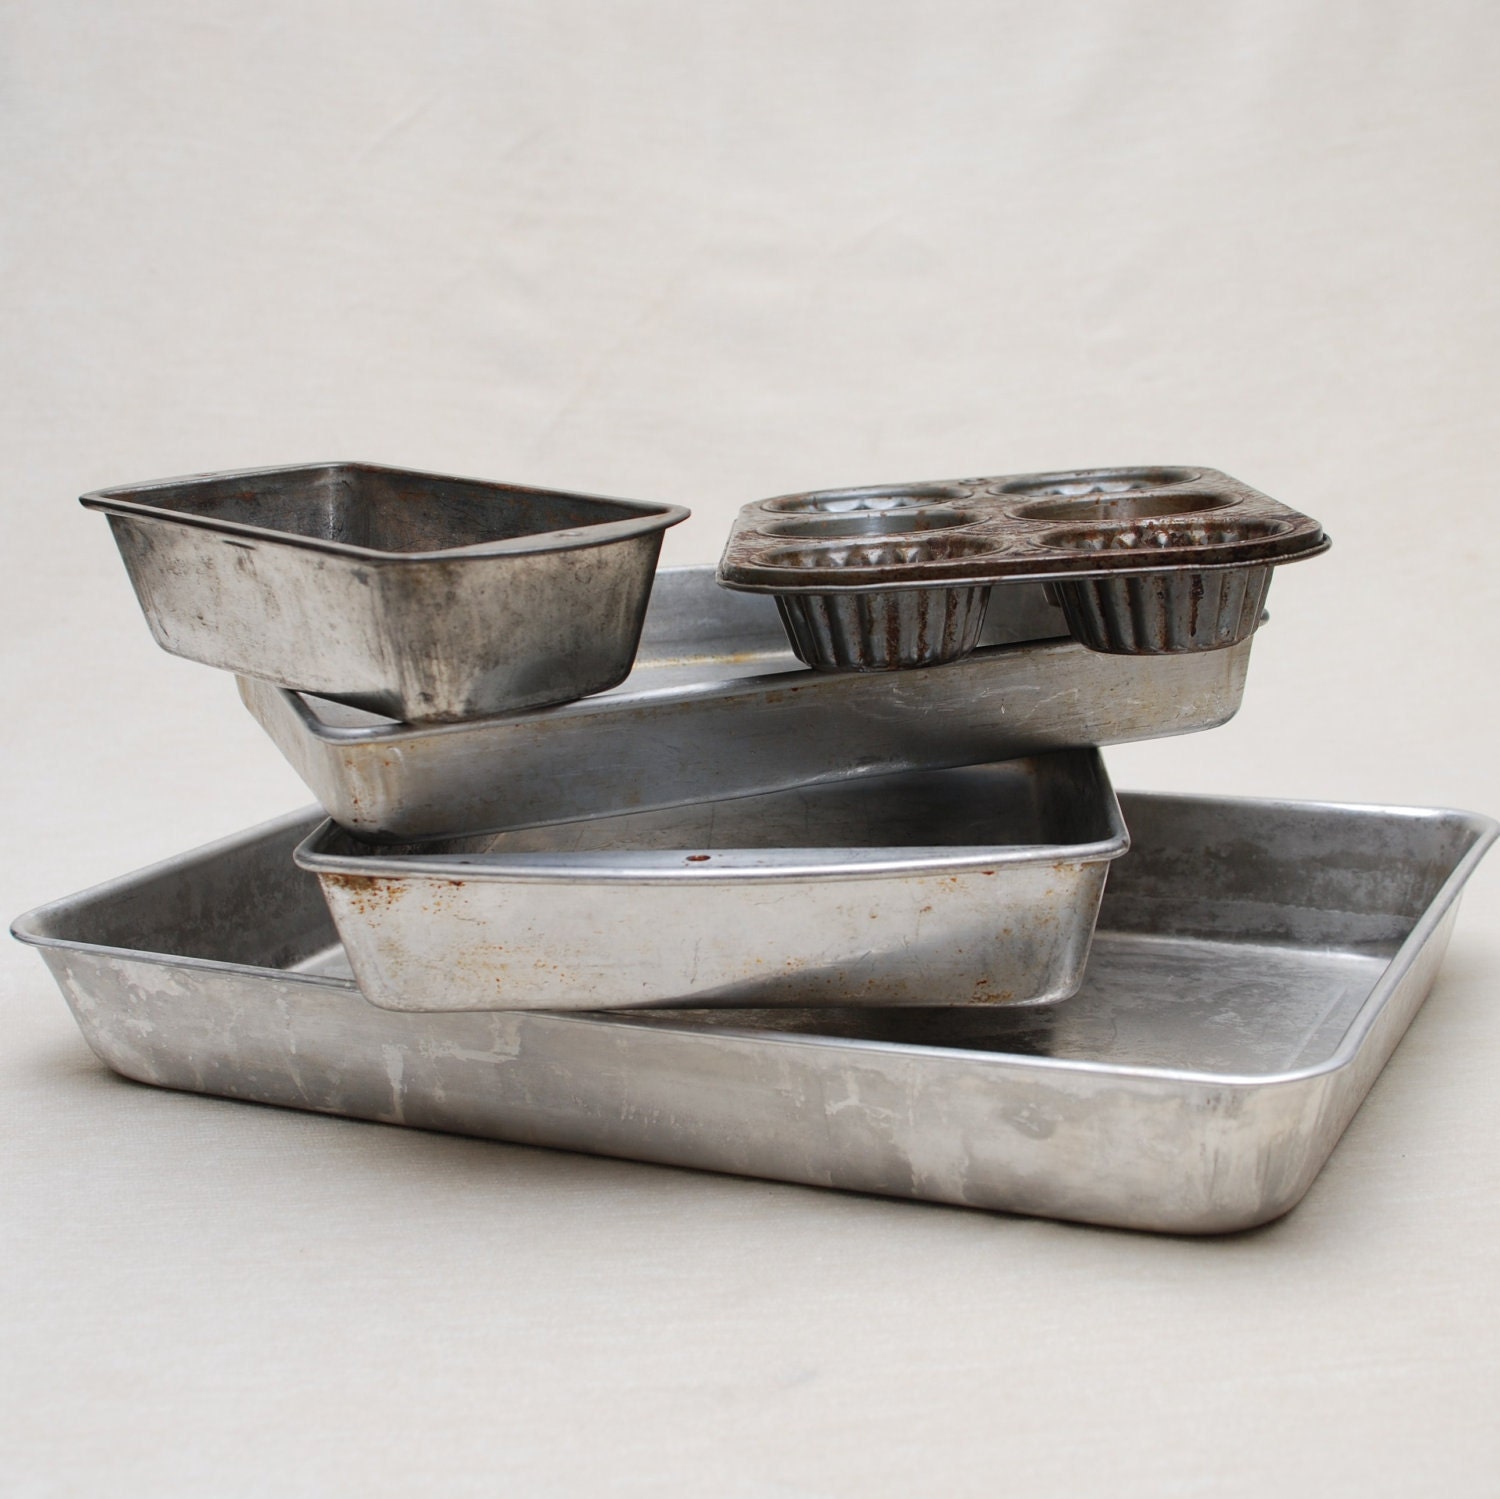
In a professional kitchen, it is important that all of your equipment fits together and works smoothly with the rest of your tools and storage space. In the average home kitchen, equipment such as bake ware, pots, and pans are often bought piecemeal, or as need dictates. As a result, many home kitchen shelves and cabinets fall prey to what I call the "Jenga" effect. Overly bulky and incompatible equipment can make even the most spacious kitchens feel cramped and disorganized. Maximize counter space and storage capacity by choosing equipment that stacks neatly or otherwise takes up as little space as possible. The tools used most often should also be the most accessible. The opposite is also true: If you rarely use that giant stand mixer, it doesn't belong on the counter top in the middle of your work space.

Durability

How long till you need to buy another one and how easy will it be to replace it?
In many cases, it's more practical and even preferable (from a professional mindset) to purchase a lower quality tool that performs just as well as the big fancy expensive one. In other words, don't swing for the fences when all you need is a bunt. Compare the frequency with which you replace or repair tools with the amount of money you spend on each replacement or repair. Consider the availability of the tool; is there an affordable and reliable source of functional replacements? Since most small appliances are cheaper to replace than they are to repair, your best bet is to learn to use the basic tools in your kitchen arsenal more effectively. Most basic kitchen tools are easy and inexpensive to replace, and (with a little bit of skill) are far more versatile than expensive and bulky machines.

There are exceptions:

a) unique tools produced in foreign countries e.g.(Italian pasta chitarra)
b) equipment containing complex moving parts e.g.(stand mixer, blender, food processor)

c) any piece of equipment that will directly impact the quality of the food e.g.(knives, pots and pans)

In the cases listed above, the quality of the equipment you use can have a direct impact on the quality of the food you produce, so a little extra cash for a superior tool may be necessary. Think of them as an extra special ingredient; like using a fresh sprig of Thyme instead of the freeze dried stuff.

Utility

How well does it perform the task it was designed for?
In a professional setting, a little extra effort to achieve a superior result is preferable to tossing everything into a blender to save time. In the home, the exact opposite may be true; again, it comes down to  individual expectations. In professional kitchens, the big questions are "What tool achieves the best result?" and "How can I get the best result with the least amount of effort?" The result is weighted heavily in favor of achieving the best result rather than minimizing effort. To answer these questions we compare the effort exerted with and without the tool with the quality of the resulting product. If a piece of equipment takes too long to set up or spits out an inferior product, it's useless.

                  UTILITY  =  (QUALITY OF PRODUCT)   :   (QUALITY OF PRODUCT)
                                    (Time & Effort WITH Tool)   :   (Time & Effort WITHOUT Tool)

Which brings us to:
Overall Value

The final result of our equations is the Overall Value of any piece of equipment that you are thinking of including in your kitchen.When applied to a tool, this equation sums up all of the factors defined above. Examining the result helps us determine and grade the quality of a tool's design, construction and utility.  By analyzing equipment in this way you can make an informed decision about how important it is to have in your kitchen and how much it should cost you (in both dollars and devoted storage space).


Monday, June 25, 2012

Mixing it up!

This post is all about mixers, blenders, and food processors.

Jumping right in

The tools I use on a daily basis:

First up, the Kitchenaid Stand mixer. 
This is a powerful machine to have at your disposal. It has so many useful features and attachments that it really is an all in one purchase.  The Kitchenaid comes out of the box with 3 standard attachments: the Whip, the Paddle, and the Hook (it's just that kind of gal), and with those you can tackle just about any baking or pastry endeavor that you can think of. Use the whip attachment for whipped cream, butter, egg whites; great for home made icing. Use the paddle attachment for any kind of thick batter that you don't feel like getting Carpel Tunnel Syndrome just to enjoy. Use the dough hook for... well, dough.


Next, the Cuisinart Food processor.
If you've ever worked in a real kitchen, you might be pulling out your hair and yelling at your computer screen right now, "You don't use a ROBOT-COUPE? SACRILAGE!!" and normally I'd agree with you. However, I have officially entered the realm of Not-for-Profititude. This means that, like most at home cooks, I have a tight budget and since Robot-Coupe food processors go for around $1k when they're on SALE... I can make do with the semi-reliable alternative. While R-C's are more powerful, easier to clean up, and built to handle rough treatment, Cuisinarts are cheaper and more than adequate to handle day to day kitchen duties. If you are not familiar with food processors: This machine basically takes a conventional mixing bowl and puts a spinning blade of death right in the center. Good for pureeing those extra chunky sauces and dips that you don't want completely obliterated into a paste (although it can do that too!).


Moving on to the BlendTec Blender.
I... love... this... Big Beautiful Bastard of a blender. I've wanted one since the company started selling them and now it's mine! Again, a lot of the professionals out there are probably going to bring up VitaPrep. To set the record straight; VitaPrep is an industry standard. You have probably never been in a restaurant that DIDN'T have a VitaPrep. That being said: they're loud, they cut out at the worst times, they spew hot liquid from the top if you forget to reset the "Turbo" switch while pureeing hot sauces (the sauce is always RED if the chef coat you happen to be wearing is white, and WHITE if you happen to be wearing black; ITS A LAW). The BlendTec has more horsepower, a welded steel base, all metal parts, a larger pitcher with square sides for more even blending, square blades for higher liquid torque, and a vented lid that prevents hot liquid from creating a vacuum and exploding directly in your face (nobody ever asked where that stain on the ceiling came from, we all just KNEW). But seriously, you could feed a rake handle into this thing and it would keep going. In fact, I've SEEN IT DONE. And for the price, you just can't get a better blender.

More reviews in the next post

Tuesday, June 5, 2012

Kitchen Knowledge: Bacteria and You.

AKA: How -NOT- to kill yourself and your entire family.


We've all (I hope) heard of Salmonella, but that's just one example of a hazardous bacteria that can find it's way into even the cleanest kitchens. There is one, and only one, sure-fire way to ensure that the food you are consuming is free of harmful bacteria: MILITARY GRADE EXPLOSIVES.

However, if you forgot to grab the Semtex while you were at the deli counter there are a few things you can do to avoid killing your entire family with flesh eating bacteria.


1. Prepare food in a sanitary environment.

Anything that your food touches should be clean and free of bacteria. This means counter tops, cutting boards, cooking utensils, the refrigerator, the sink (probably the least obvious), and of course... your hands. Proper hand washing with some kind of anti-microbial soap is a must. Kitchen surfaces can be sanitized using a weak bleach solution (10:1 ; water : household bleach), but if you don't like the chemical smell, distilled white vinegar works just as well as a disinfectant. Vinegar is actually my preferred method of sanitizing cutting boards (and most other surfaces).


2. Wash raw foods properly.

E. Coli has become a big concern in the fresh vegetable industry, but it can be easily defeated by properly sanitizing anything that will go into your mouth without being cooked. Items such as baby carrots, cucumbers, salad greens (including the bagged "ready to eat" variety), hand fruits such as apples and pears (you get the idea) should all be washed thoroughly before you put your lips on them. Once again, white vinegar is the champion in this arena. You may have seen costly "vegetable sanitizing spray" being sold at your local grocer, but the same benefit can be had at a third of the cost (and none of the chemicals) by putting some diluted white vinegar in an empty spray bottle and using it to clean your produce.


3. Learn to recognize and effectively fly through the "DANGA' ZONE"

The Danger Zone (or "TDZ" in kitchen talk) is the range of temperatures where bacteria thrive and are able to reproduce unimpeded, like micro-rabbits hopped up on goofballs and Cialis. A reliable kitchen thermometer is a good buy, especially since these days they come relatively cheap. Here's what to do with it:

Bacteria Control Table

°F


  • 212 Boiling point of water.
  • 165 Cooking temperatures destroy most bacteria. Time required to kill bacteria decreases as temperature is increased.
  • 140 Warming temperatures prevent growth but allow survival of some bacteria.
  • 120 Some bacterial growth may occur. Many bacteria survive.
  • 60 - 120 Incubation (DANGER) zone. Temperatures in this zone allow rapid growth of bacteria and production of toxins by some bacteria. Foods should move through this temperature range as quickly as possible to avoid microbiological spoilage.
  • 40 - 60 Some growth of food poisoning bacteria may occur.
  • 32 - 40 Cold temperatures permit slow growth of some bacteria that cause spoilage.
  • 0 - 32  Freezing temperatures stop growth of bacteria, but may allow bacteria to survive.


There I go with the science and math again.
Some kitchen thermometers do come with an optional pocket protector (highly recommended, not to mention stylish), but that's up to you. 
The basic idea is to have food spend as little time in TDZ as possible. This means that frozen meat should be thawed in the refrigerator (not the counter top or sink) and raw meats should be kept cold until you are ready to cook them. 


Poultry should always be cooked to 165 - 170 degrees, but whole muscle cuts of beef can be served safely at a juicy 125 degree rare. This is because bacteria propagates on the outside of meats, not internally. Since meat doesn't even start to brown until the surface reaches 230 degrees, most cooking methods such as searing, grilling and roasting will take care of any bacteria hanging out on the surface of your steak. Once the meat has been ground, however, the difference between internal and external is irrelevant and proper cooking is necessary. 


For a good guide on using your thermometer to cook meats to temperature:


Your family and friends will no doubt be impressed when you choose not to kill them at your next BB-Q...


Just make sure that they know it was a choice. 


Sunday, May 13, 2012

Slicing and Dicing

 AKA: Tiny food cubes and how to make them with your knife.

When I got started in the kitchen I had no idea how much MATH I would be using on a daily basis... and not just simple adding and subtracting either; we're talking ratios, averages, geometry!

Most chefs probably wouldn't describe it that way, but to the analytically minded it makes a lot of sense to view the kitchen from a mathematical standpoint.

What does all that have to do with dicing vegetables? Well, think about it: what is "dicing?"

Dicing is the culinary cut used to take a big thing and divide it up into lots and lots of uniformly 'cube' shaped smaller things.


There are numerous reasons why a chef would want to do that, but the main ones are:

Aesthetic appeal: presenting a perfectly uniform product is a way for cooks to display their professional skill and prowess in the kitchen.

Standardization: cooking times are affected by the mass and volume of an object relative to the method of cooking applied to it. By cutting ingredients to a uniform size the savvy chef can control how long it will take to cook them. The smaller the object, the less cooking required. The 'cube' shape is also ideal for ensuring ingredients are cooked evenly. Just think of dice rattling around when you play Yahtzee; there is equal opportunity and probability that all six sides will at some point be in direct contact with the surface of the table (or in this case the surface of a hot pan!)

How to Dice
The most important aspect of a proper dice is consistency. 

There's a big difference between 'whacking up' and 'dicing.' That difference is consistency. When dicing, the space between the cuts you make will be the same size every time. If you can consistently perform those measured cuts, you can rely on the finished product being uniform. 

Vegetables come in all different shapes and sizes, but the general method of dicing will usually be the same: 
  • Remove as little excess product as possible to make a big cube;
  • Divide that cube into slices; 
  • Divide those slices into columns; 
  • Divide those columns into uniform cells

This is the basic 'grid' method of dicing and is the most widely used by professionals. Potatoes and carrots are good mediums for practicing this technique. 

Some vegetables are abnormally shaped and provide a particular challenge to culinary perfectionists (think butternut squash), but you'll get the hang of it with a little bit of practice and creativity. Just look at the object and imagine the greatest possible combination of cubes you can carve out of it. 

There are three different sizes of dice: but I'm feeling lazy so I'll tell you about those later.

Friday, May 11, 2012

Tools and Techniques: Taking Care of Your Knife (cont'd)


In my last post I talked about some of the tools commonly used in knife sharpening. In this post my emphasis will be on keeping your knife sharp. Taking care of a good knife should be easy. It's just like putting oil in your car; a little routine maintenance will go a long way toward extending the life of your knife. The bottom line is: Respect your tools and they will serve you indefinitely.  

The most important things you can do to keep your knives in good condition:

Keep it sharp.  Keeping your knife sharp does not require frequent use of a whetstone; in fact, Over sharpening your blade will ruin it. The thinner the blade, the sharper the edge; the more metal you take away from the intended edge of your knife the closer you get to the thick spine at the back. This will make it increasingly difficult to achieve the ideal shape needed to produce a fine cutting edge.

This is where the honing steel comes into play. Sharpening is the act of removing metal from the edge of your blade to achieve an ideal cutting angle; honing removes no metal and is meant solely to preserve the edge that you already have. This means that it is useless to use a honing steel on a knife that is already blunt because you won't be taking enough metal away to reshape the edge. Different knives require different honing techniques, but for this example I'll assume that the knife in question is of Western origin and is made from a slightly softer steel.

To the naked eye your knife blade will appear smooth and continuous, but if you examine the edge of your blade under a microscope, you will notice what are known as 'micro-serrations'. As you use your knife, these saw-toothed micro-serrations will warp and become misaligned, causing increased drag as the blade is drawn through whatever material you happen to be cutting. The goal of using a honing steel is to realign those micro-serrations into a closer approximation of a smooth and continuous line. 

When using a honing steel, the most important thing to remember is consistency. Use smooth strokes to drawn the knife across the steel at about a 30 to 45 degree angle. Very little pressure is necessary, and speed is definitely NOT a factor, so just focus on keeping your angle consistent. Honing should be performed before AND after using your knife. 

Keep it clean. Metal is porous; this means that dirt, oils, bacteria and food particles can become embedded in those pores to corrode and tarnish the finish of a knife. Avoid touching the business end of you knife with your bare hands; if you must handle the blade, remember to wipe it clean with a damp cloth afterward. Clean your knife as soon as you are finished using it to prepare food and sanitize it regularly. A good method for sanitizing your knife is to pick up a container of oxalic acid based cleansing powder ('Barkeeper's Friend' is a recommended brand). Dab a damp sponge in the powder and scrub down the entire knife including the handle; Make sure not to cut yourself while cleaning the blade.

Thursday, May 3, 2012

Tools and Techniques: Taking Care of Your Knife

Grinding, honing, stropping, lapping:
Isn't it all the same thing?!


That's cute, Timmy... now let me hit you with some knowledge.

Let's start with this: The thinner the edge, the sharper the blade will be. Straight razors are able to shave hair because the have a very thin, delicate edge.

So why don't chefs chop onions with straight razors? 


Well, the key word here is DELICATE. Think about the last nail you tried to hammer into the wall; no matter how softly you tap it with that hammer it starts to bend, right? Now imagine tapping on a nail as thin as a human hair. Doesn't work, right?

When attempting to put a proper edge on a knife, a little knowledge about the materials that you are working with can go a long way.

Example:

Harder metals can hold an edge for longer, but are more difficult to sharpen and less resistant to chipping.

Softer metals are easier to shape into a sharp cutting edge, but they will dull quickly and require more frequent maintenance.

Most quality knives on the market today are produced with a combination of these two attributes in mind. Some cooks desire a very hard edge that requires little effort to maintain once it's been shaped; others want a softer, more flexible blade that can easily take a razor edge with a few swipes of a honing steel.

Tools and Terms:

Grinding: Grinding is the process of removing metal from the surface of the edge in order to achieve the desired shape. The tools used for this step are called "grinding stones" and they come in progressively finer grits, just like sand paper; the finer the grit, the less metal is removed when you pass it across the stone.


Honing: Honing is used to maintain an edge that you already have on a blade. A "honing steel" (that rod thingy  that your dad pretends to know how to use when he carves the thanksgiving turkey) is made from very hard metal which is designed to realign the fine, delicate edge that you just ruined by slamming it repeatedly into a cutting board. We'll talk about how to use it properly later on.

Stropping: We've all seen "ye olde" barber doing his thing with the razor and the leather strop, but what the hell is it for? Well, human hair is surprisingly strong and to cut it the edge needs to be thin enough actually slip between the individual cells that the hair is built from. The blade is so thin that taking any metal away from it would remove the edge entirely, so instead the metal is drawn out and refined using the strop.

Lapping: Lapping is the final step in polishing a knife: Every time you scrape a piece of metal against a rough surface, tiny scratches are left. Lapping utilizes a surface which is fine enough to leave only infinitesimal scratches that result in the smoothest, mirrored surface possible. The smoother the surface, the higher the polish, the lower the friction created when drawing a knife through whatever it is you are cutting. 


Okay, Timmy, that's enough knowledge for today. Write it out fifty times in Greek and tomorrow I'll start telling you how to put it all together.


Peace.


(Continued here)

Wednesday, May 2, 2012

How to choose a knife

Any chef worth his salt (heh heh) will tell you that the most essential piece of kitchen equipment that you can own is a sturdy, sharp, chef's knife.

That having been said, there are literally thousands of kitchen knife brands and styles to choose from. The most important thing is to find one that works for you and that does the job you need it to

Most home cooks don't need a $300 MAC (although they are oh so dreamy...), but by the same token you don't want to skimp on such a vital piece of equipment. You may end up with a tool that won't reliably do what it's supposed to, which in this case is... cut stuff. 
So where's the middle ground?

Somewhere between Cutco and Kanetsugu

Knives are a lot like designer fashion: fads come and go. Why? Because different people like different things; they have different needs, different sized hands, and different levels of skill at using and caring for their tools.

In the end, you want a knife that sits comfortably in your hand, is produced from good quality materials, and is within your capabilities to properly maintain. 

Here are some important questions to ask when buying a knife:

What will I be using this knife for, and how often?

Does the weight feel right? Is it well balanced?

Is the grip comfortable?

How was it produced, and of what quality material? 

Where was it made?

Who made it?

How difficult will it be to keep in good working condition? 

What special tools, if any, are necessary to maintain it?

How much am I willing to spend?

I love my Wusthoff classics, but there are people out there who wouldn't be caught dead holding one. The reason I like them is because they're good "workhorse" knives. They take a beating and pretty much beg for more. They fit my needs and I like the way the handles feel. 

BUT KEEP IN MIND...

I am a professional chef. I use my knives all day every day. I have the time, the tools, and the experience to service my knives personally, and for me a new knife equals a tax write-off. 

FINAL ADVICE:
Evaluate your need: 
ARE YOU:
A) an Iron Chef in search of "Excalibur?"
B) an ambitious weekend warrior shopping for the latest Food Network endorsed mini-machete?
C) a home cook desirous of utilitarian grace and efficiency at a reasonable price?

Do "hands on" research:
Go out to the department store and pick up a few knives. 
NO! PUT THAT WALLET AWAY... jackass...
Don't buy anything yet, just pick them up with your dominant hand and see how they feel. Try looking in shops that specialize in kitchen equipment and see what the clerk can tell you about the different brands. Remember the questions you asked yourself earlier and ask the person behind the counter to help you answer them.

Shop around:
It's okay to fall in love with an expensive knife, but before you hand over your credit card (or sulk away with your pockets turned out), get on the interwebs and see if someone else can give you the same knife for less. Try chefknivestogo.com
While you're at it, find a review of the knife you like and read what other people might have to say about it. For more professional advice, check out cheftalk.com.


Happy hunting, and remember...

Cutco sucks.